Yes, I have an exam tomorrow. And, yes, that's why this day is so perfect for crafting, for finally making all those things that caught my eyes on other blogs last few days. First I saw paper ornaments on
Zakka life and on
How About Orange again few days ago. Maybe just because of postponing the crafting my own paper ornaments I had a chance to get an idea to make a variation of earlier mentioned ones.
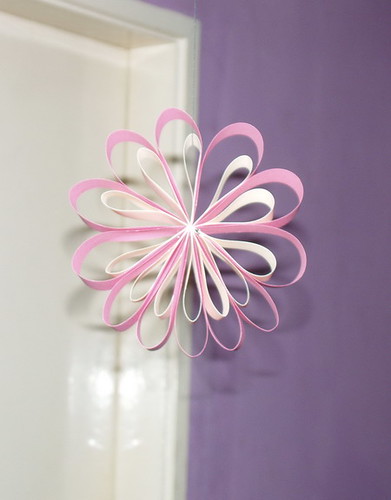
Here's what I've came up with:
Also, while making it I realized that if you do not finish the project to the end, but stop on one of the steps you can get a nice gift wrapping, as shown above.
And, here's the tutorial:
1. You'll need:
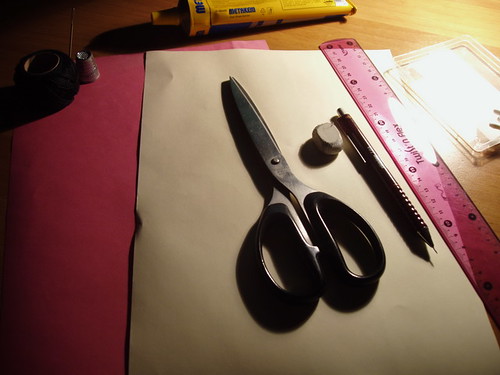 paper - I used two A4 papers of two different colours
- ruler
- pencil
- scissors
- glue
- stapler (this should save your time) or thick needle and thread (but this would work too)
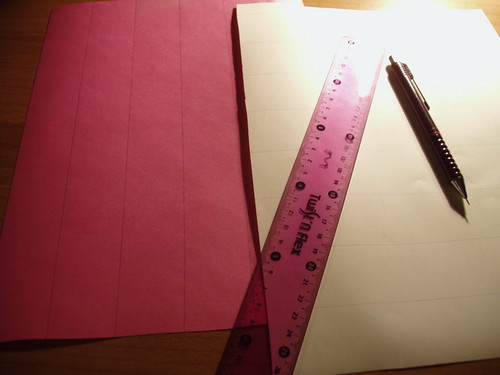
2. Draw your lines. I choose to have longer strips for pink one, and shorter for the vanilla one. My strips are 3,5 cm wide (about 1,4 inches).
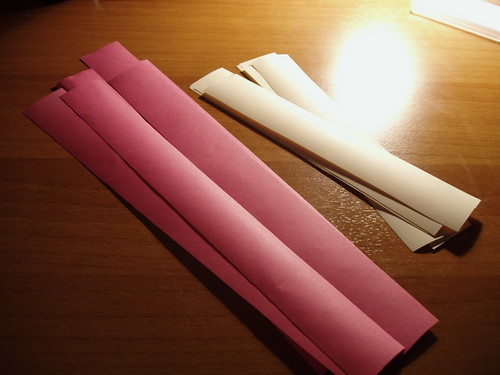
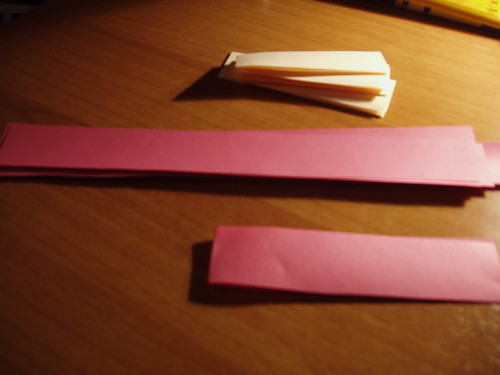
3. Cut the strips. I got 6 pink strips, and 8 vanilla ones, but you must have the same number, so I used 6 of each.
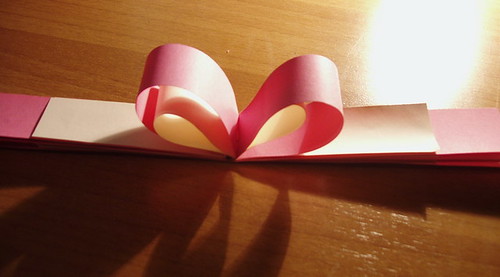
4. Fold them into half:
5. Put the strips together in a way that you put one pink, one vanilla, one pink... :
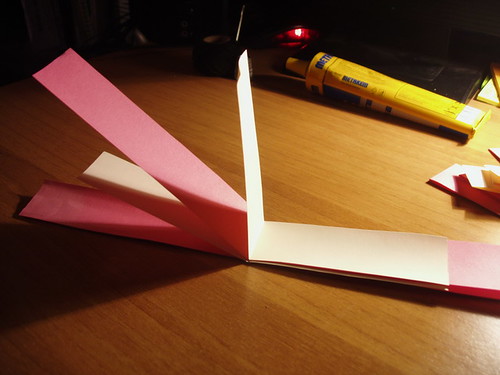
This is how they should look:
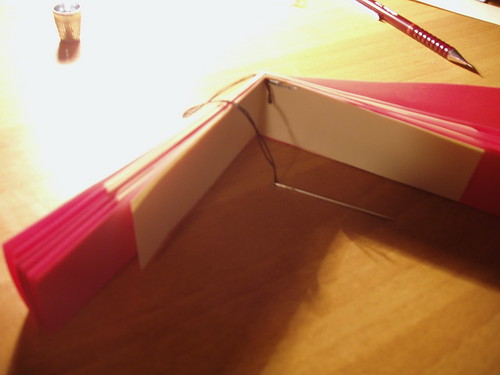
6. Sew the strips together in the middle:
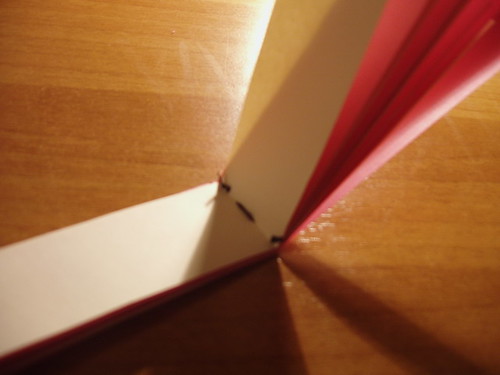
7. Glue the inner strip (if you click on the image you will see bigger one, and than you can clearly see where the glue should go):

8. Glue the outer strip (same as before):

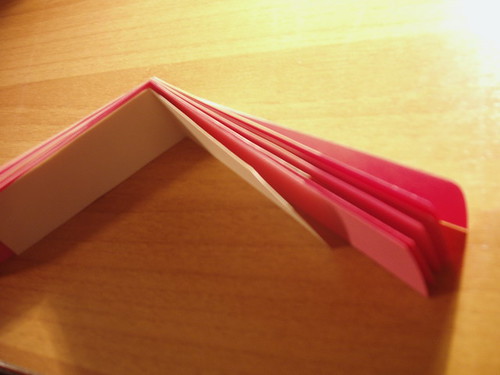
9a. When you make just 2, 3 or 4 of them you may want to stop there, as now it makes a nice ribbon for gift wrapping:
9b. Or go all the way around until you glue them all and get this:
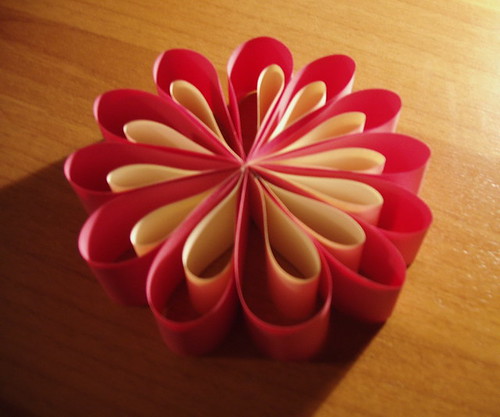
Final ornament is 13 cm (5 inches) in diameter.
I like how it looks different from different angles, and I'd love to play with it more, but right now I have to study :(
As soon as I get back to this, I'll post what else I've made using same technique.
I hope you liked it!

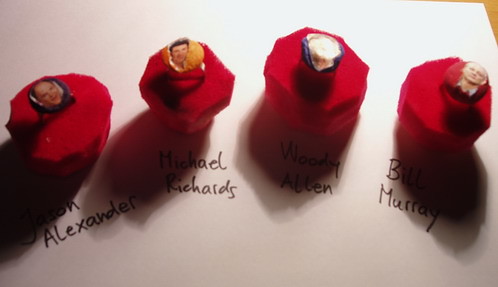 Ring boxes:

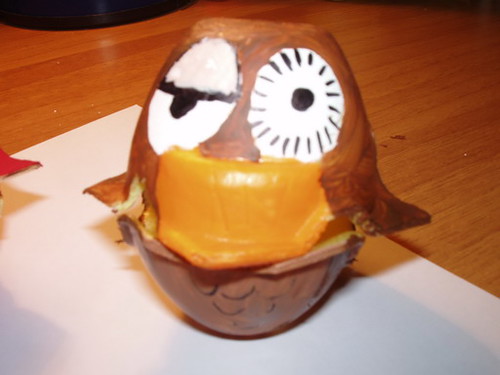
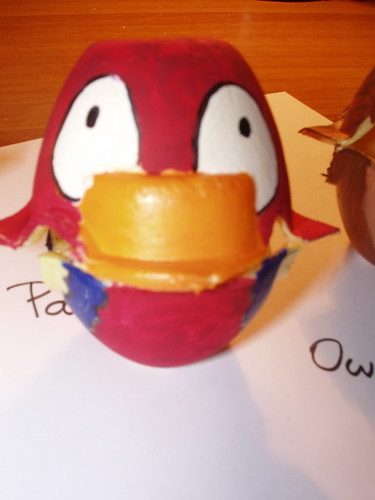


 You can do what ever you like to decorate your can top covers. What's cool about them is that they already have the little hook on the top, and that they're made of metal and already have nice white, golden or silver color.